Telnet versus SSH
Many people continue to use Telnet for sensitive applications or access to critical systems. Telnet is CLEARTEXT, so all the data, including the login id is visible is someone intercepts that session
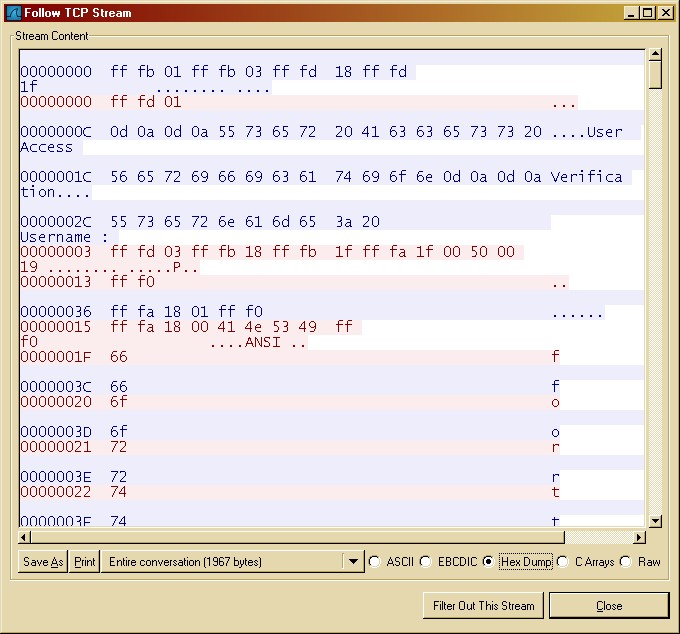
Here’s what this looks like using Wireshark an Open Source Protocol Analyzer when we use the Follow TCP Stream feature in Wireshark.
The next characters are red (the character I typed) and blue (the characters echoed back)
You clearly see the User Verification Prompt.
Here's the telnet trace file.![]()
Below you can see me typing in my username;
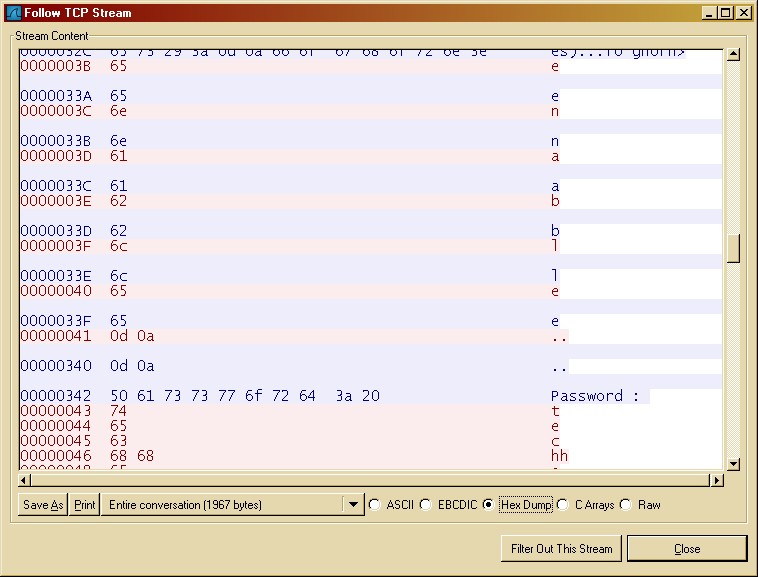
In this screenshot below you can see me entering the command enable and the the enable password.
How to Enable SSH Version 1 on Cisco
Before you can enable SSH you need to assign individual (or group) user IDs and passwords.
These are just login id's and are required regardless if you use Telnet or SSH.
To enable locally administered user IDs, use the following set of configuration commands. I would not suggest using the nopassword parameter.
Put your own data in the italized text.
foghorn#configure terminal Enter configuration commands, one per line. End with CNTL/Z. foghorn(config)#username fortunato password secret foghorn(config)#aaa new-model foghorn(config)#aaa authentication login local_auth local foghorn(config)#line vty 0 4 foghorn(config-line)#login authentication local_auth foghorn(config-line)#exit foghorn(config)#end foghorn# |
Now when you telnet into the device you should see the Username prompt
| User Access Verification Username: fortunato Password: foghorn> |
Now that you have login id's created you can turn on SSH version 1.
To enable SSH, use the following set of configuration commands. I would not suggest using the nopassword parameter.
Put your own data in the italized text.
|
foghorn#configure terminal Enter configuration commands, one per line. End with CNTL/Z. foghorn(config)#crypto key generate rsa % Please define a domain-name first. ! common mistake when you do not the IP domain-name created foghorn(config)#ip domain-name thetechfirm.com foghorn(config)#crypto key generate rsa The name for the keys will be: foghorn.thetechfirm.com Choose the size of the key modulus in the range of 360 to 2048 for your General Purpose Keys. Choosing a key modulus greater than 512 may take a few minutes. How many bits in the modulus [512]: 1024 % Generating 1024 bit RSA keys ...[OK] foghorn(config)#ip ssh time-out 120 foghorn(config)#ip ssh authentication-retries 5 foghorn(config)#end |
Now we'll try to capture the SSH login and as you can see
the login data is no longer in clear text. Here's the SSH 1 trace file.![]()
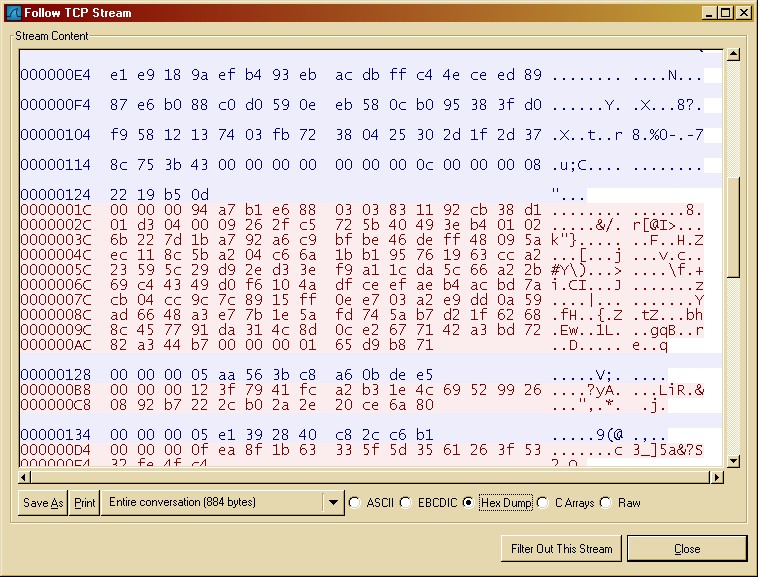
The moral of the story is not to use Cleartext logins if the device or application is sensitive.
To upgrade to even more secure SSH version 2, type in the following commands
| foghorn(config)#ip ssh version 2 foghorn(config)#no ip ssh version 1 foghorn(config)#end |
the SSH version 2 trace files are here
![]()
In this write up I used;
Wireshark Protocol Analyzer (free)
Putty Telnet/SSH Client (free)
Cisco Switch (not free)